The Kaltura My Media area is a private space where media content may be uploaded and managed. From the My Media area you may edit your videos’ options, create clips from your videos, delete videos, publish videos to the Course Media Gallery, and more.
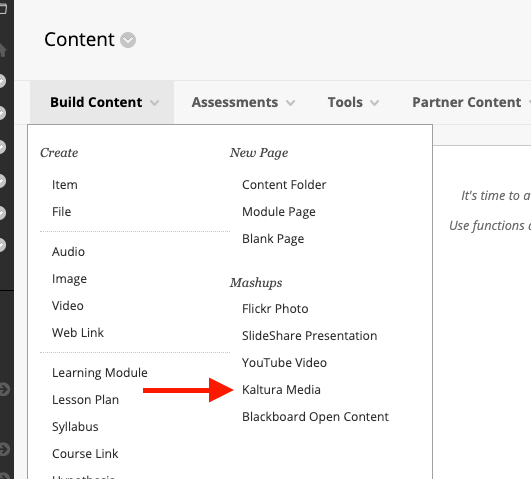
To add a video to your course (such as an item, assignment, Discussion Board post, blog post, etc.), see Using the Kaltura Media Mashup tool.
To view and manage all media you have created, see Kaltura My Media.
How to upload content to My Media repository in Blackboard (Original)
Add Media to Content Folders in Blackboard (Original Course View)
Adding a Media Gallery to your Blackboard course
- Hover your mouse cursor over the ‘ + ‘ icon in the navigation menu
- Select Tool Link
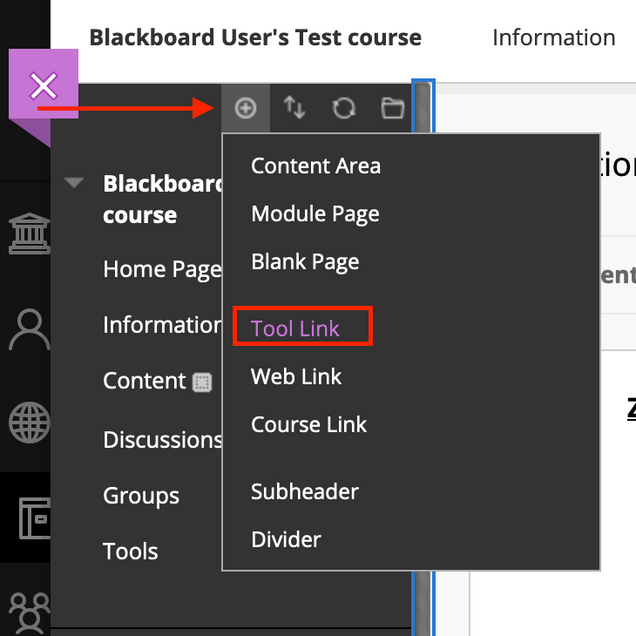
- Choose Media Gallery from the tool list, give it a name, and make sure it is ‘Available to Students’

The Media Gallery is explained in more detail here
How to upload content to My Media repository in Blackboard (Ultra)
Add Media to Content Folders in Blackboard (Ultra Course View)
How to Create an Assignment for Student Video Submissions
Create an Assignment for Student Video Submissions in Blackboard (Ultra)
Similarly to other gradable items in Blackboard Learn courses, you are able to create assignments that allow students to submit their own videos using the MyMedia system. The main difference in assignments that allow video submissions is you providing instructions to students to upload their video(s) through MyMedia.
To create the video assignment in Blackboard Ultra, follow these steps:
- Login to Blackboard with your BU username and password. Select your course from the Courses tab.
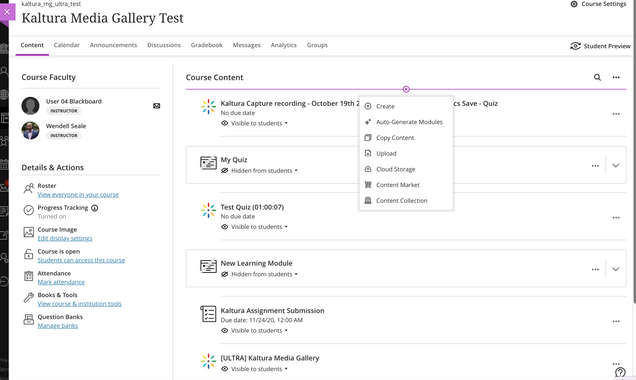
- Click the purple plus icon under the content folder where you’d like to display the video assignment. Then, click Create.
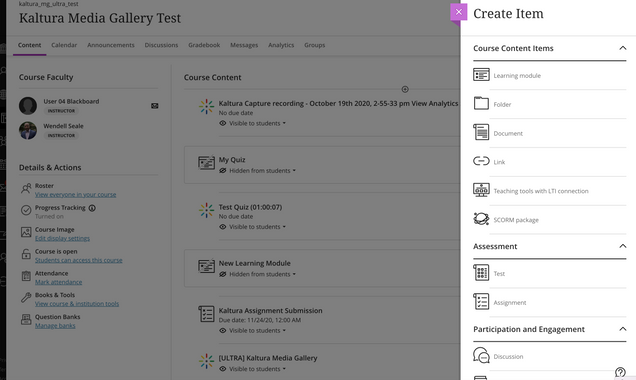
- On the right-hand side navigation, click Assignment.
- Type in a name for your assignment at the top using the pencil icon.

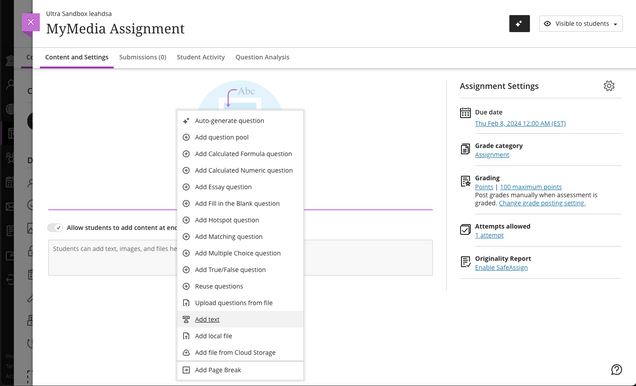
- Insert instructions for your assignment by clicking the plus icon under “Create your assignment.”
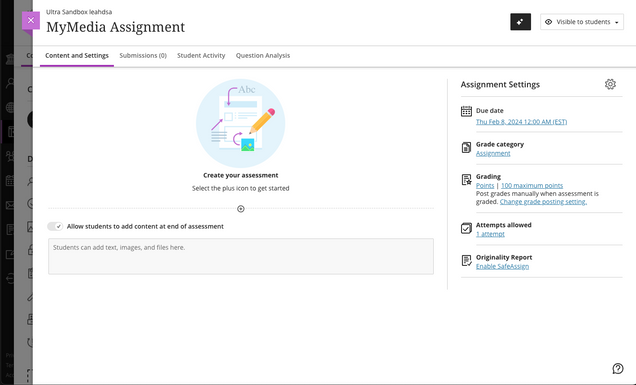
- Click Add Text.
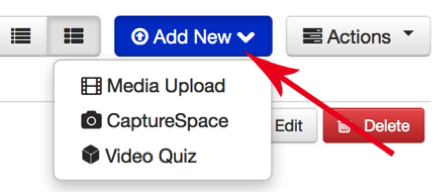
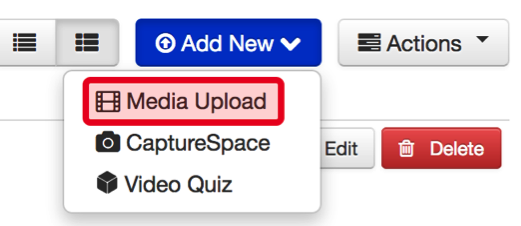
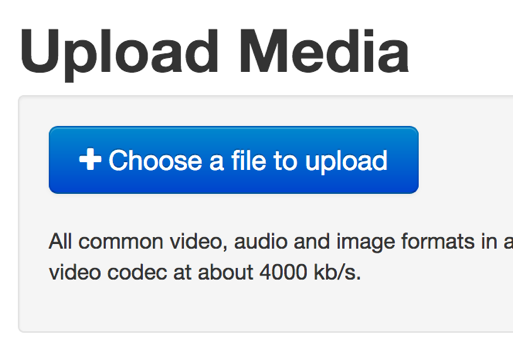
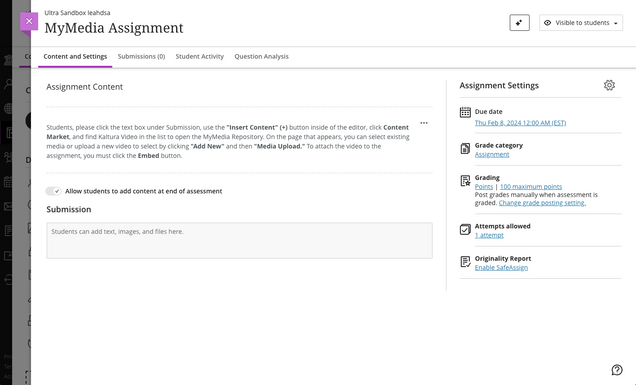
- Provide specific directions here for students to upload their submissions. Instruct them to click the text box under Submission, use the “Insert Content” (+) button inside of the editor, click Content Market, and find Kaltura Video in the list to open the MyMedia Repository. On the page that appears, students can select existing media or upload a new video to select by clicking “Add New” and then “Media Upload.” To attach the video to the assignment, students must click the Embed button.
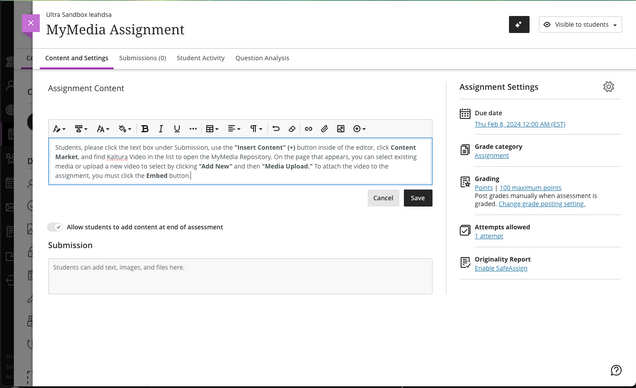
The previous steps can be repeated if additional media needs to be attached to the assignment submission. Click Save to complete the instructions and save to the assignment. Students can find more information on how to submit an assignment using MyMedia here.
- After filling in the assignment instructions, click the dropdown menu Hidden from students in the upper right hand corner, and select visible to students when you are ready for students to have access to the assignment.
Uploading To Questrom Tools
Add Media to Content Folders in Questrom Tools
Adding a link to MyMedia in Questrom Tools
The following steps will walk you through adding My Media tool to a course site in Questrom Tools.
- Login to Questrom tools at http://questromtools.bu.edu with your BU username and password
- Select a course site from the site tabs at the top.
- Go to Site Info from the left Menu bar and select “Edit Tools”.
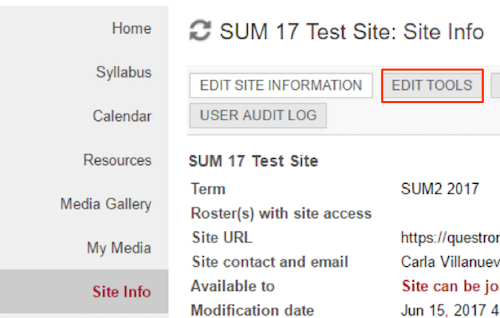
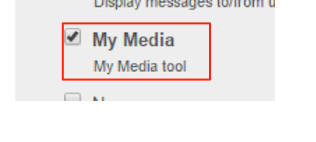
- Select “My Media” from the list of tools, click on Continue and Finish.
Using My Media
Edit Video Options
You may edit your video options, including details (name, description, tags), collaborators, options (clipping and comments), and more.
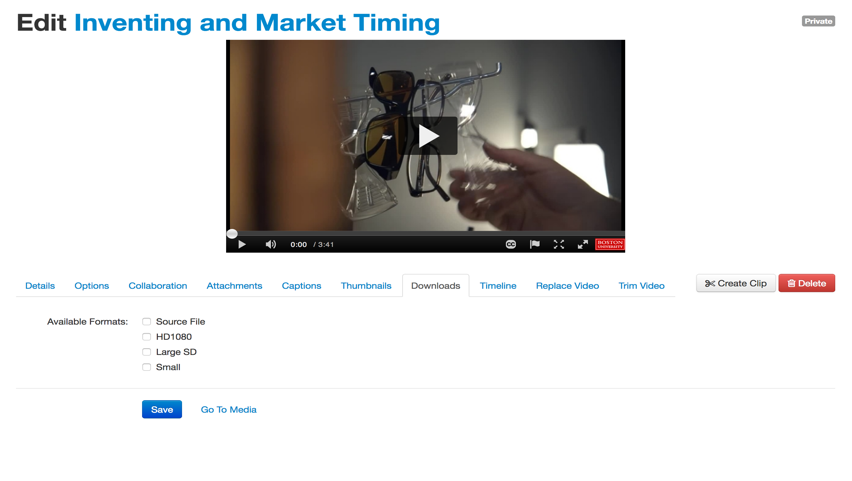
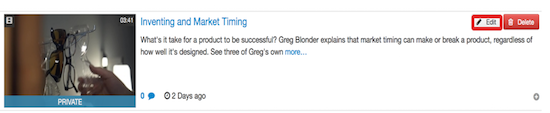
- To edit your video, go to your My Media area and select the video you wish to edit. Click Edit.
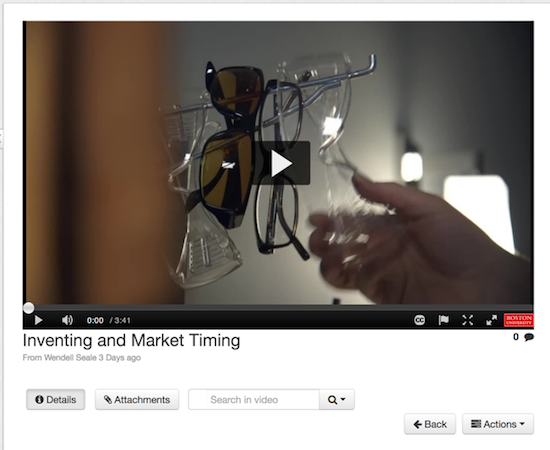
- This will bring you to the Edit area. Here you may preview the video, see the publishing status, and edit your video details and options.
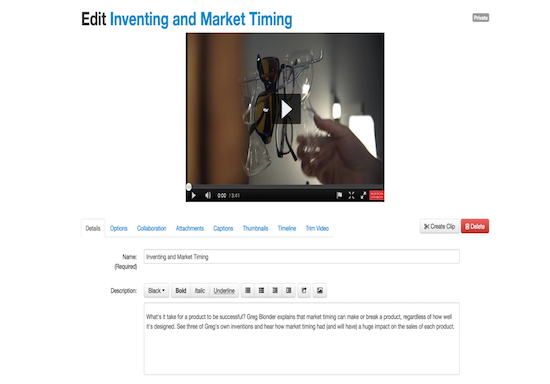
- Click the Details tab to edit details, such as the video title, description, and tags.

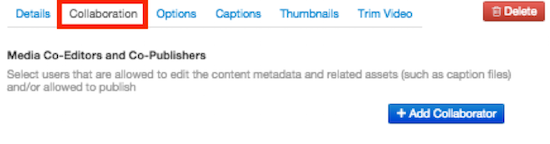
- Click on the Collaboration tab to allow others to collaborate on your video. (You can only collaborate with people who have already uploaded video to Kaltura My Media before.)
- Click on the Options tab to allow others to create clips of the video and to enable or disable commenting.

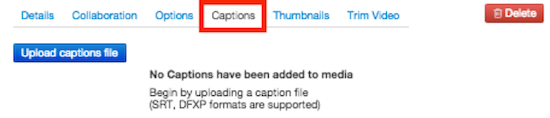
- Click on the Captions tab to upload a captions file.
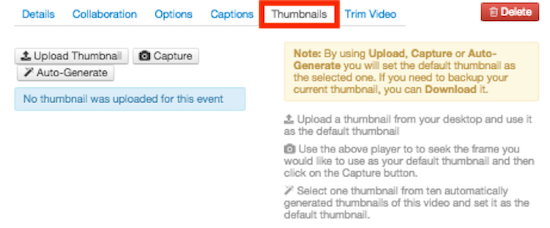
- Click on the Thumbnails tab to create or replace the video’s thumbnail image.
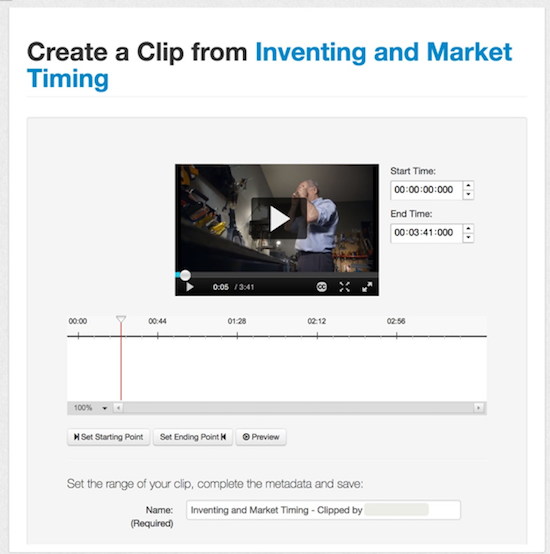
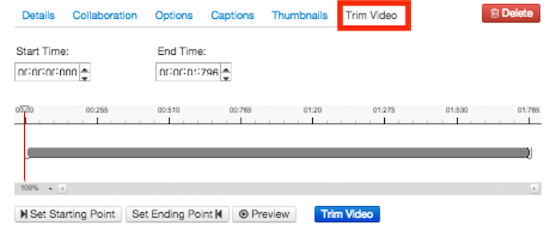
- Click on the Trim Video tab to trim your video.
WARNING: Trimming video will replace your original media!
- Once you have finished, click Save.
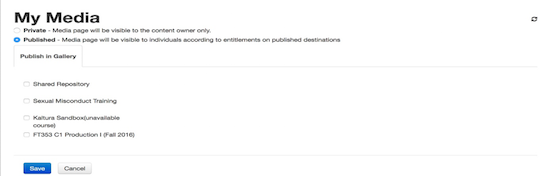
Publishing to the Course Media Gallery
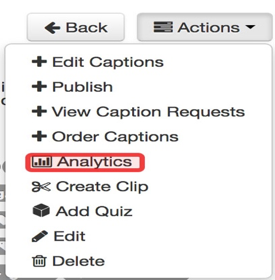
- To add content to the Course Media Gallery, select the video you wish to add. Click the Actions button and select Publish.

- Select the Course Media Gallery to which you would like to publish and click Save to publish your video.
- By default, your instructor will need to approve the content before it is added to the Course Media Gallery.