Enabling meeting authentication can also improve the reliability of pre-assigned breakout rooms, attendance, and polling reports.
Enabling Authentication for a Meeting
Authentication can be enabled for your meetings when they are scheduled or by editing an existing meeting. You can enable authentication from the Zoom website, Zoom app, or Blackboard integration.
The steps below walk through enabling authentication for an existing meeting on the Zoom website.
- Log in to Zoom Meetings using your BU Login. If you use Zoom Meetings for HIPAA, please log in here.
- Select “Meetings” from the menu on the left.

- Locate your meeting from the list and click “Edit”. If your meeting is recurring, edit all occurrences.

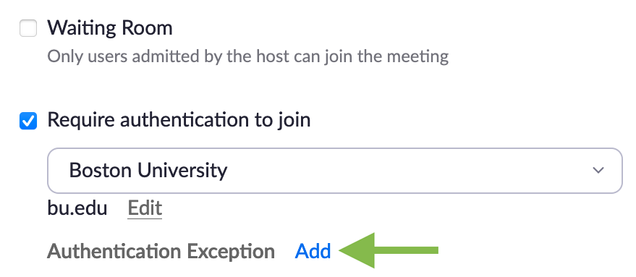
- Locate the “Security” section and check “Only authenticated users can join.” You can then select either “Boston University” or “Sign in to Zoom” depending on your preferences.

- Click “Save.”
Adding Authentication Exceptions
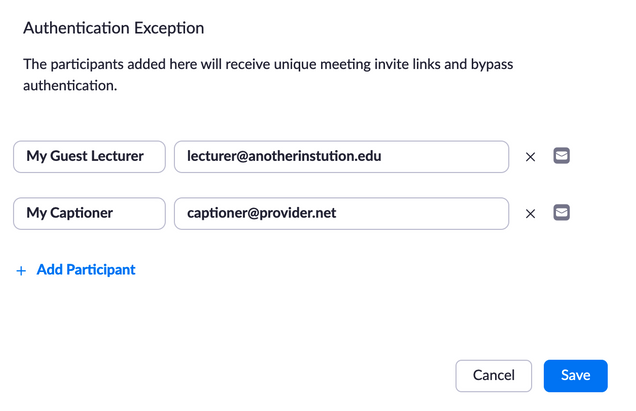
If you have a list of individuals who should bypass your authentication requirement, you can add them to the “Authentication Exception” list. This is useful for inviting guest lecturers or service providers, such as captioners or interpreters, without reducing the security of your meeting.
Authentication exceptions can be added from the Zoom website; the option is not yet available when scheduling in the Zoom app or Blackboard.
- While scheduling a meeting or editing an existing one, locate the “Require authentication to join” option.
- Note: You can authentication exceptions to a single occurrence of a recurring meeting by selecting and editing just that occurrence in your meeting list. You cannot add a one-time exception to a recurring meeting with no fixed time.
- Click “Add” to the right of “Authentication Exception.” Authentication must be required for this to appear.
- Click “Add Participant”
- Enter the name and email of your external guest. Continue adding additional participants as necessary.
- Click “Save,” then save your meeting settings.
After saving your meeting, your invited participants will receive an email with a unique meeting link. When it’s time for the meeting, your guests can use this link to enter without authenticating.
An example email is pictured below. The email does not currently include an option to add the event to a calendar.

Hosts can resend this email or rescind an invitation at any time by editing their meeting on the Zoom website.
Invited guests will still be subject to your waiting room requirements, as applicable. If you require registration to attend your meeting, they will not need to register. Should they try to register, they will see the following message:
You have been already invited by the host, please check your mailbox for the invite.
Specifying Additional Domains
By default, enabling meeting authentication will restrict your meeting to BU email addresses only. You can also add domains for other institutions as needed. Adding consumer domains, like gmail.com, is not recommended. This can be helpful for safely hosting collaborative events.
- While scheduling a meeting or editing an existing one, locate the “Require authentication to join” option. Ensure that it is enabled and “Boston University” is selected.
- Click “Edit”
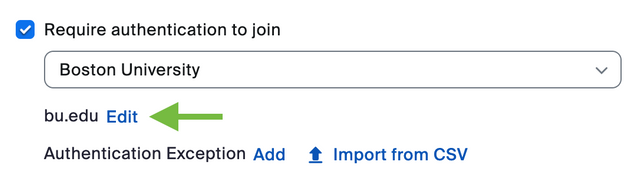
- Add additional domains to the list, separating each one with a comma. For example, a joint meeting between Boston University and Boston College will use:
bu.edu, bc.edu - Click “Save,” then “Save” again to finish updating your meeting.