IS&T and BUMC IT are transitioning to a new macOS device management system. This transition will help us deploy devices directly to you, without requiring assistance from on-campus IT support teams, while keeping your software and OS secure and up-to-date.
As part of the transition, you’ll need to follow a few steps to move your device into the new management system. For assistance, please contact us.
What should I expect?
- Transitioning your computer should take about 5 minutes.
- You’ll need to know and enter your current Mac password. In many cases, this is your BU password.
- While you should not need to restart your computer, we recommend taking a moment to do the following before migrating:
- Save anything you might be working on
- Exit open applications, as you are able
- Disconnect from the BU VPN, if you are currently connected
- You do not need admin permissions to perform the migration.
How do I migrate?
You’ll find the migration tool in Self Service, which is a red Rhett icon on your dock and in your Applications folder:
- Open Self Service, then look for “Migrate to Kandji” option. You can also click here to open it directly.
- Click the “Migrate” button to start the process.

- Over the next few seconds, you’ll see a number of notifications appear indicating that your device was removed from remote management. You may also see notifications about Cisco Secure Client’s network filter and extensions from Cisco or Crowdstrike. If these appear, you can select “OK” or “Allow” to dismiss them.
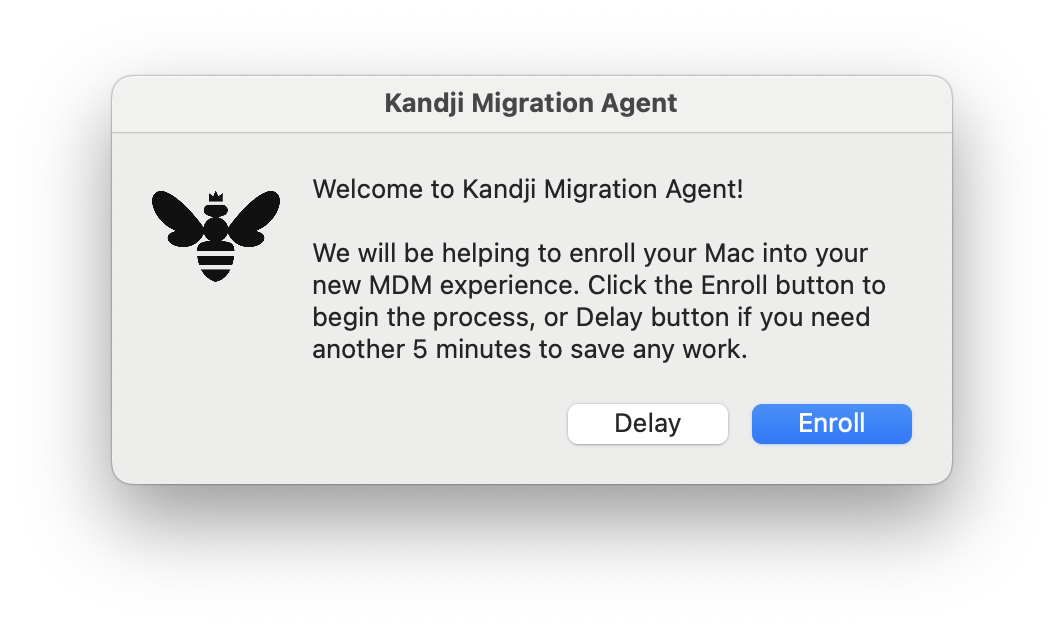
- A screen welcoming you to the Kandji Migration Agent will appear. Click the “Enroll” button.
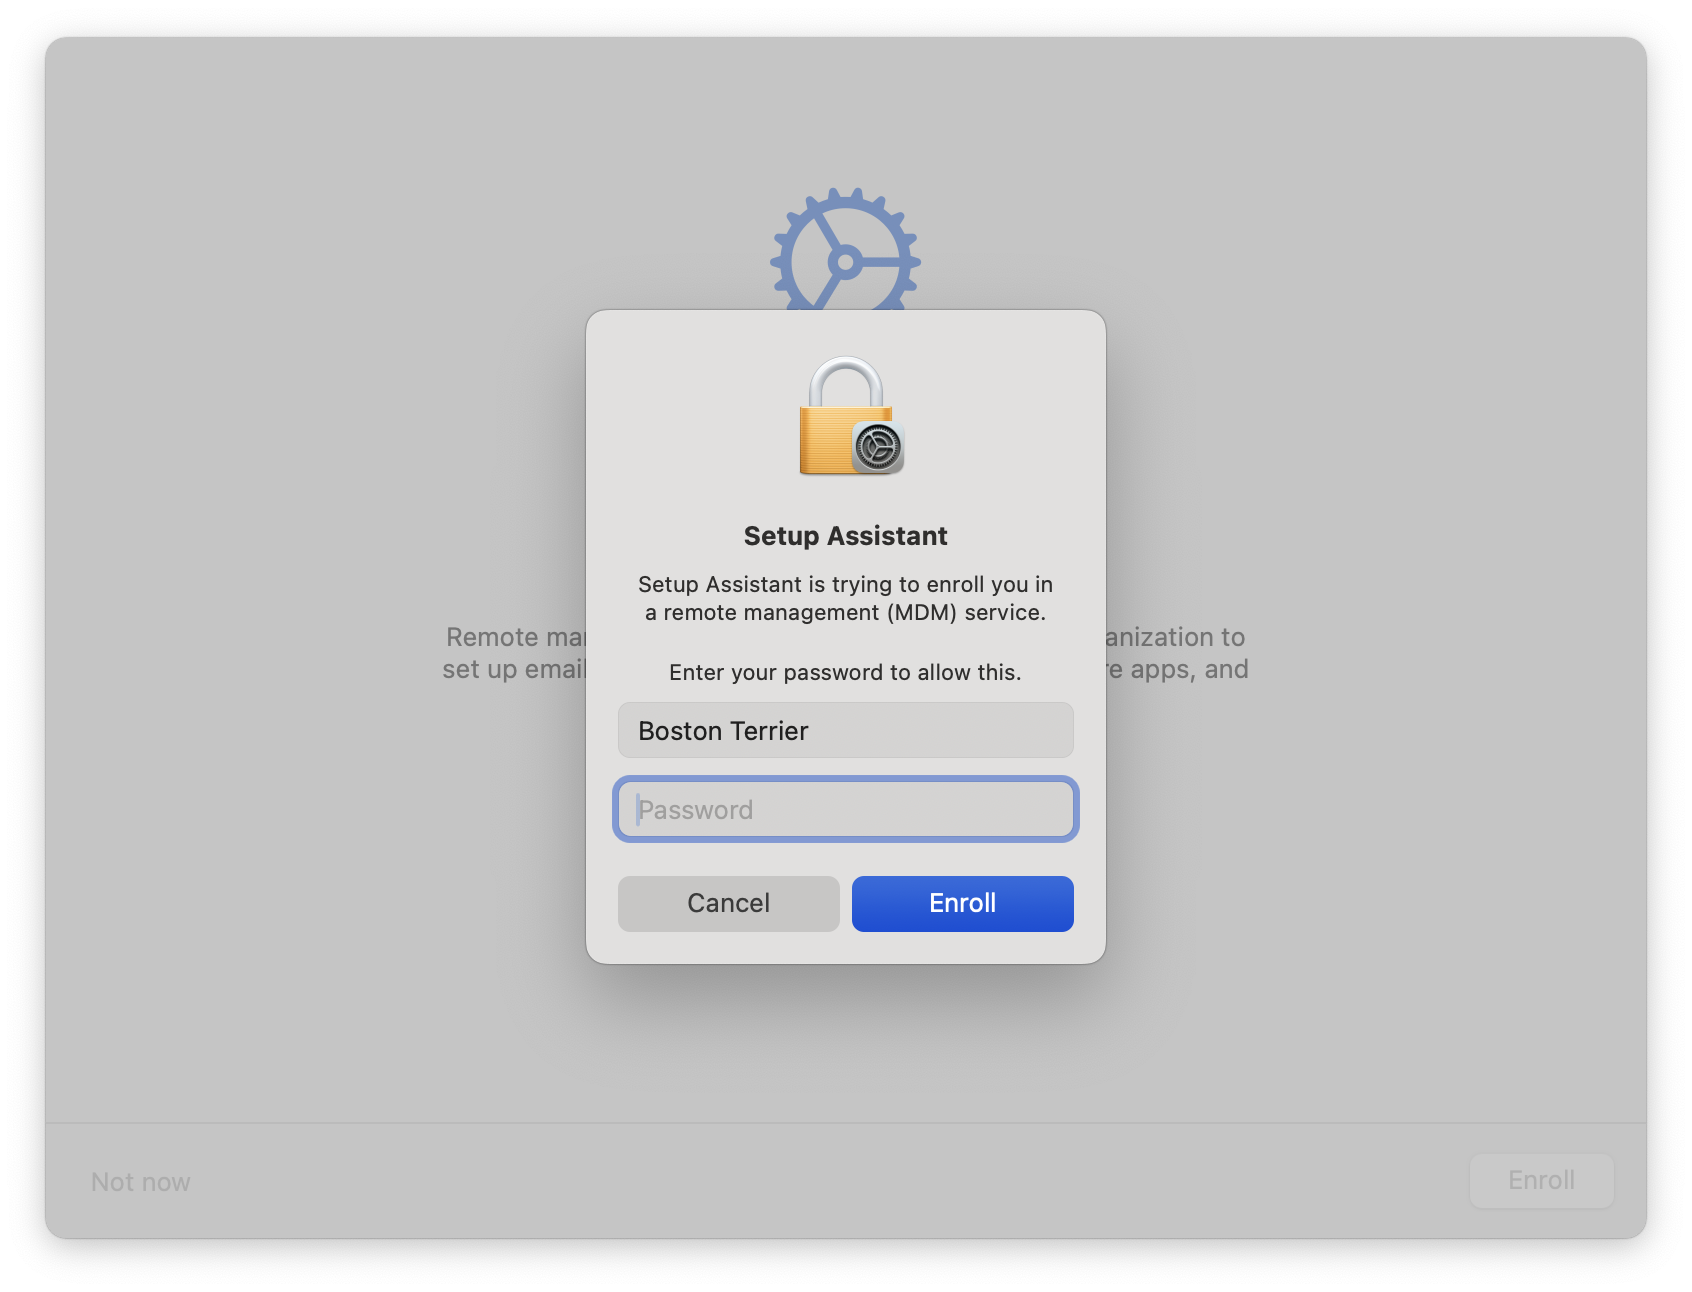
- macOS will present you with a Remote Management screen. Click “Enroll,” then enter your Mac password.
- Click “Quit” once enrollment is complete.
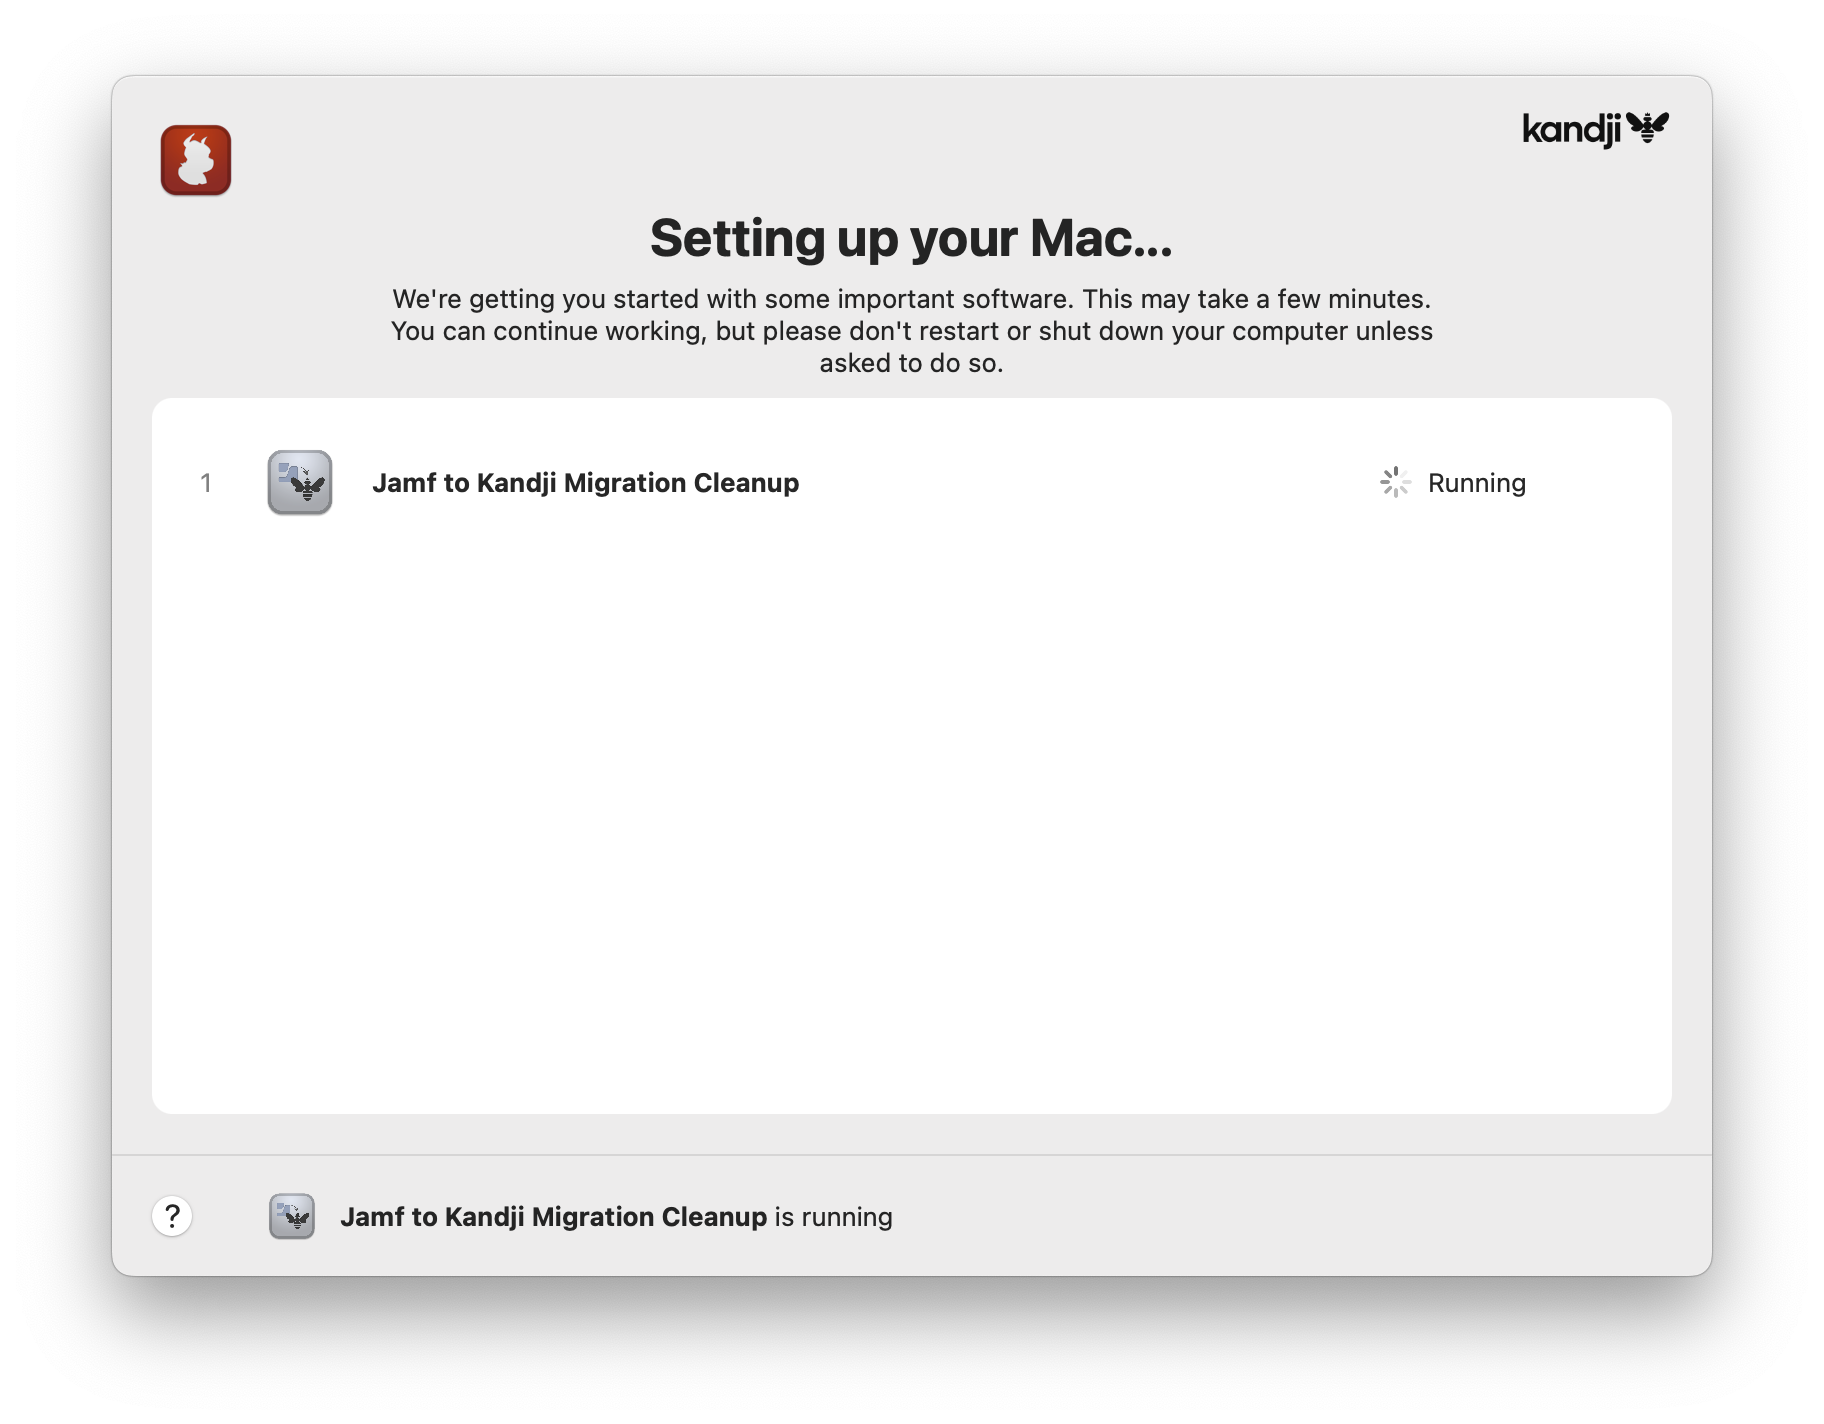
- Within a few minutes, a “Setting up your Mac…” screen will appear and show the status of the migration cleanup process.
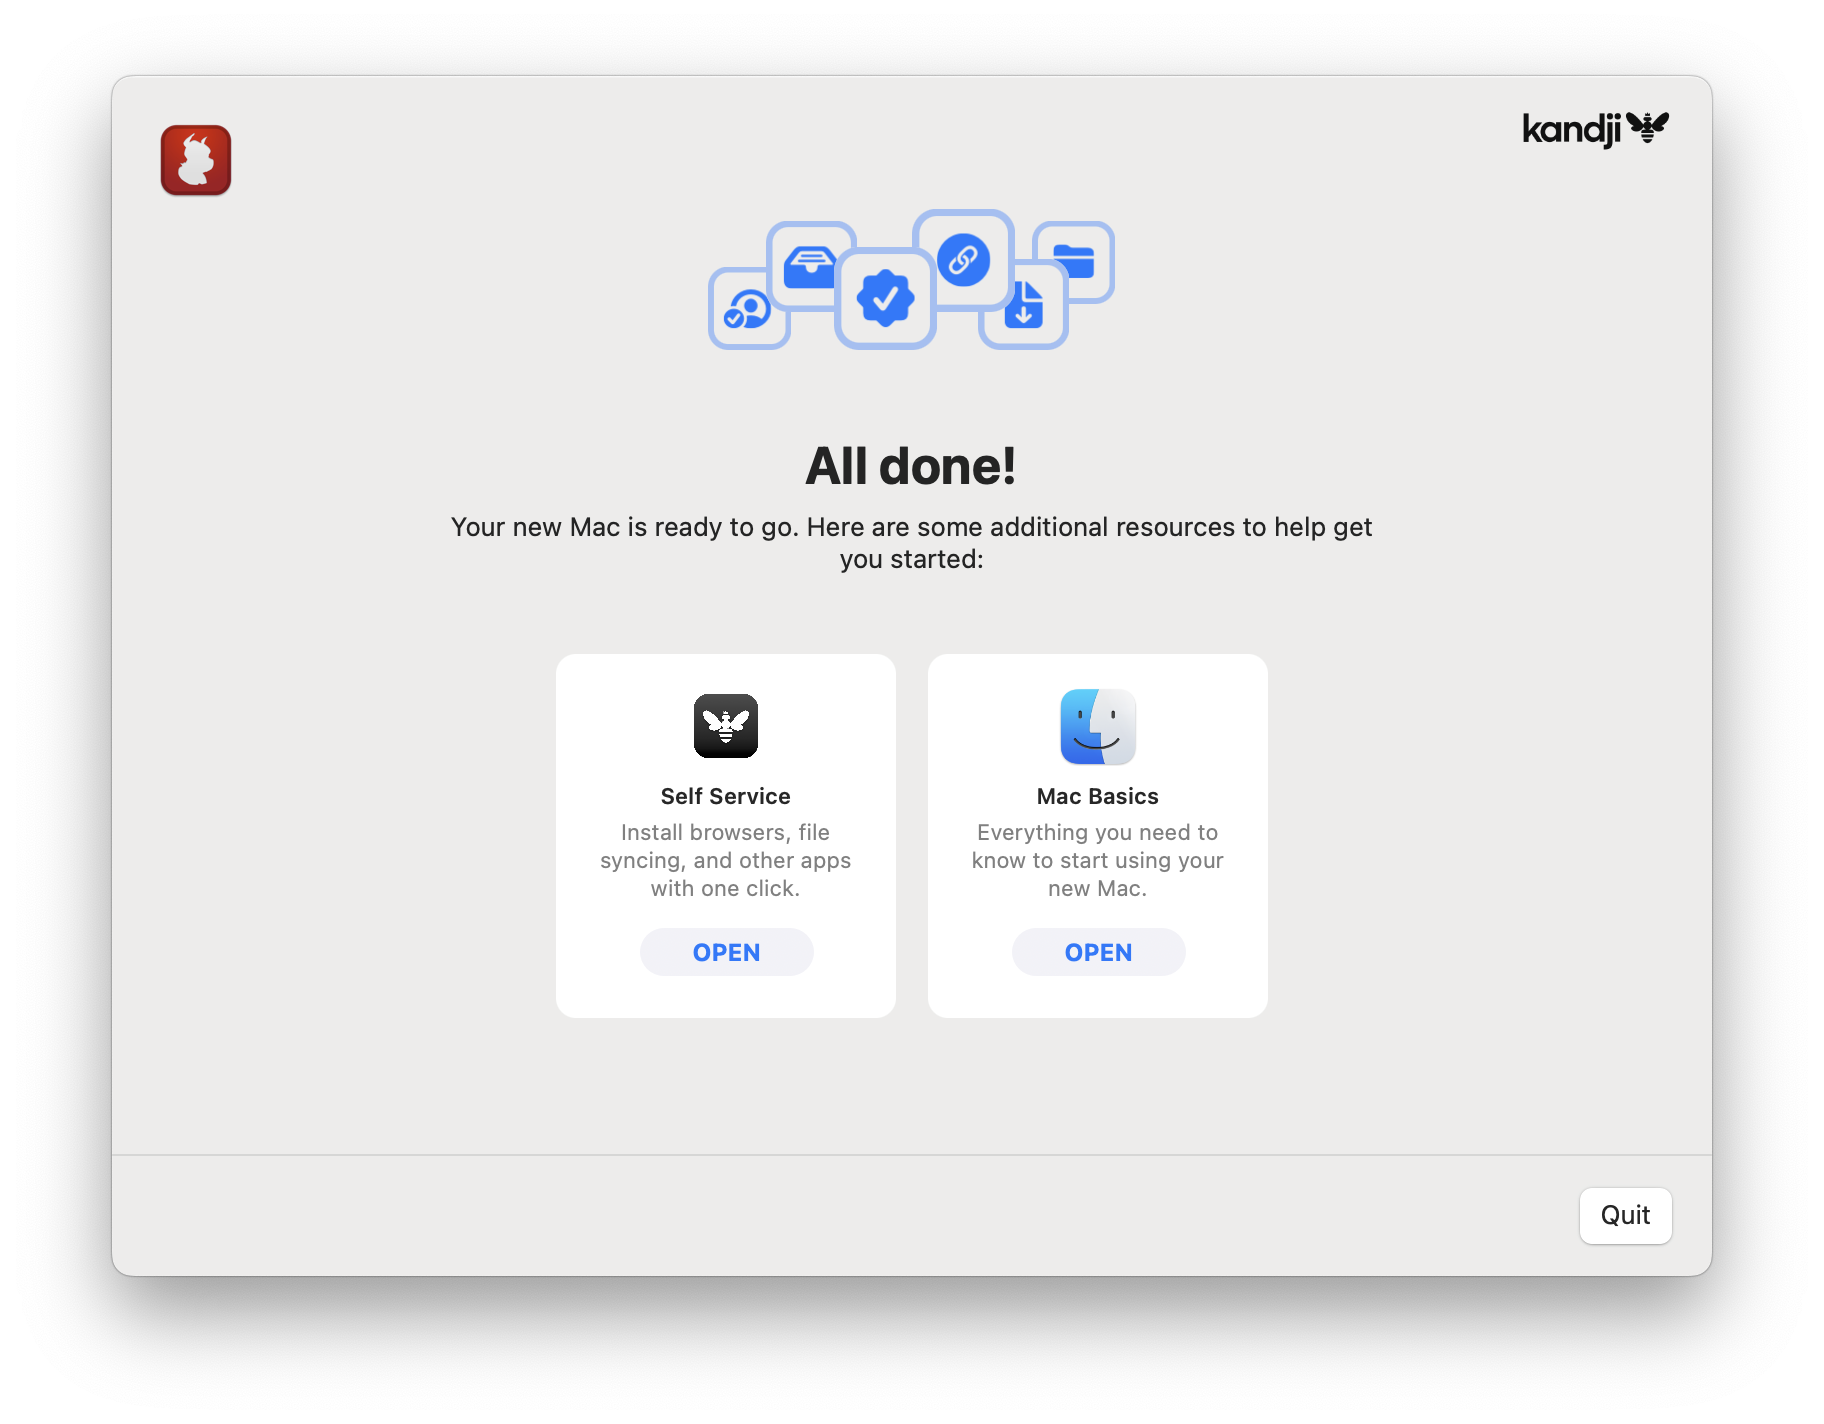
- Once finished, an “All done!” message appears, inviting you to try the new Self Service app. You can open Self Service or select Quit. Self Service will always be accessible via your Dock or Applications folder.
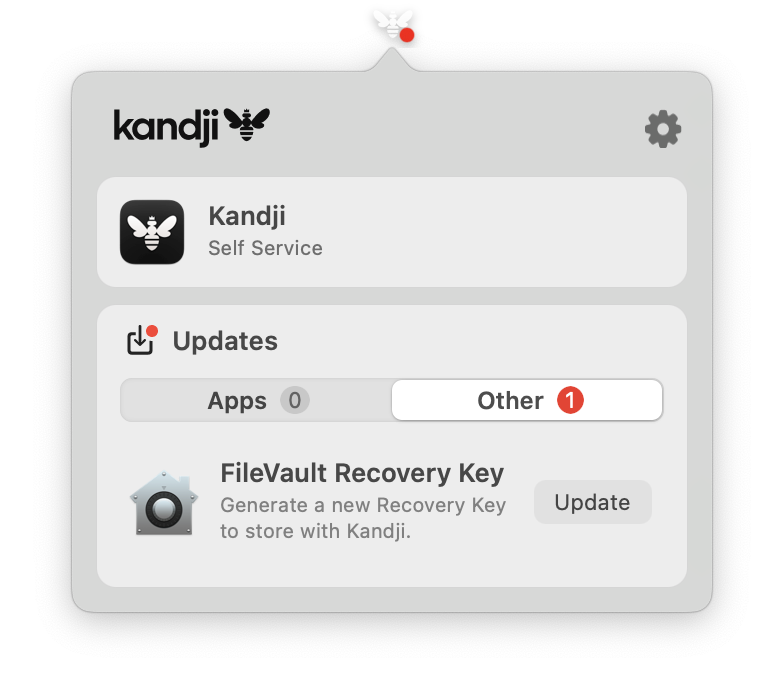
Shortly after migration completes, you will see the notification below prompting you to generate a new FileVault recovery key.
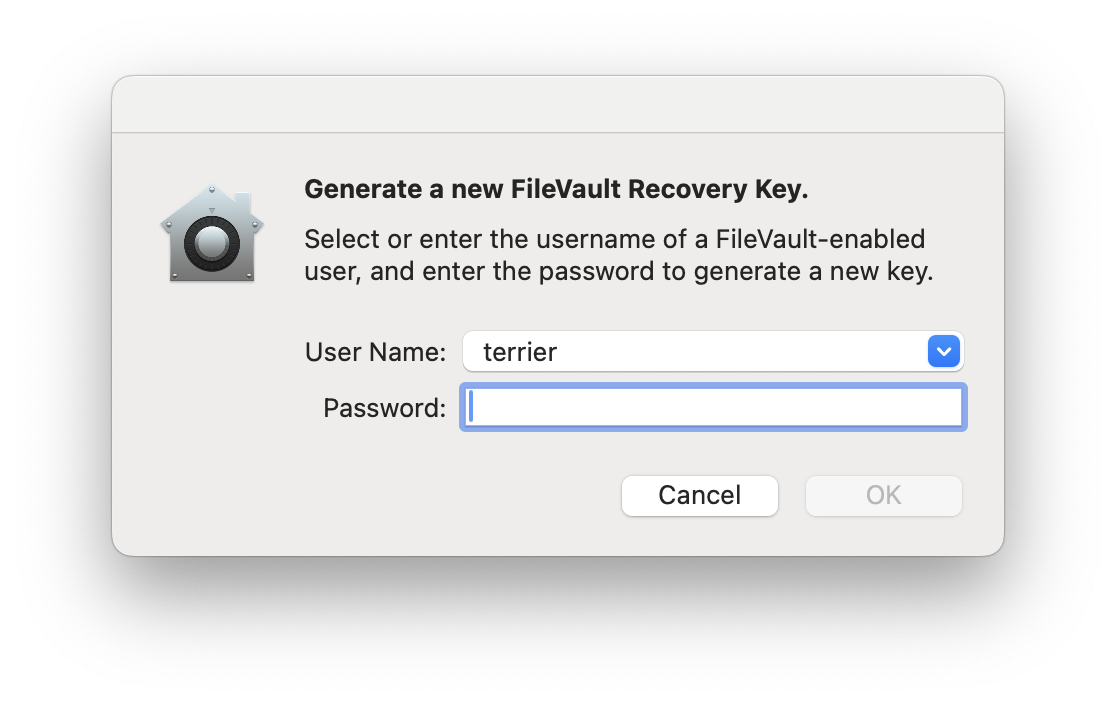
- Interact with the notification or click the Kandji bee menu bar icon at the top of your screen.

- When prompted, enter your Mac password, then click “OK”
Is there anything I should do after migration?
In many cases, once you’ve finished the steps above, you’re all set!
Common applications, like browsers, Microsoft Office, or Zoom, might automatically update in the background after you’ve finished migrating. If any outdated apps are currently open, Kandji will present you with an update deadline and the option to close and update the apps immediately.
Managed App Store Apps
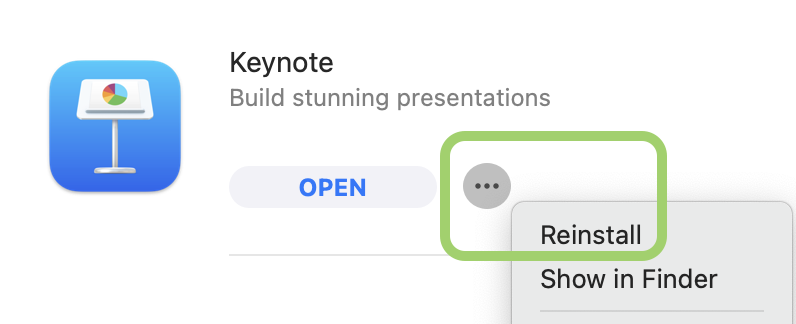
If you previously downloaded App Store apps via Self Service, you may need to manually update or reinstall them using the new Self Service app. This includes: iMovie, GarageBand, Keynote, Numbers, Pages, Microsoft To Do, and Slack.
To do so:
- Open Kandji Self Service from your Dock or Applications folder, then locate the Updates section. You can also click here to open it directly.
- Click the “Update” button for any apps shown.
- For any other apps from the list above that do not have updates available, locate them in Self Service, click the “…” button beneath its description, then select “Reinstall.”