Original
Add Users to your Course (Original)
When students register for your course, BU automatically adds them to your Blackboard Learn course site. However, you can also manually add additional users to your course through the Control Panel. To manually enroll a user:
- Log in to learn.bu.edu using your BU login name and Kerberos password.
- Locate and select your course in the list.
- In the navigation menu to the left, look under the Control Panel and expand the Users and Groups menu.
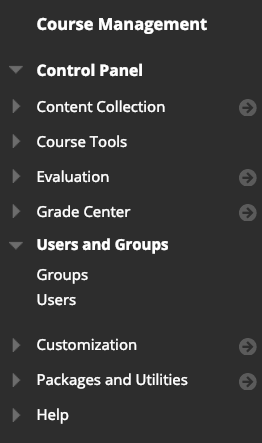
- Select Users.
- Hover over Enroll User and click Find Users to Enroll.

- Enter the BU username in the Username box and move to step 8 below (do not include @bu.edu when adding by Username).
If you would like to add more than one user at the same time, enter all of these BU login names in the Username text box, separated by commas. It is recommended that you do not click ‘Browse’ as there is a known issue where the user is entered into the box twice and will not successfully enroll

- Select an appropriate role from the drop-down menu.
- Select Yes for the Enrollment Availability.
- Click the Submit button.
- To verify the new user’s enrollment status or their role:
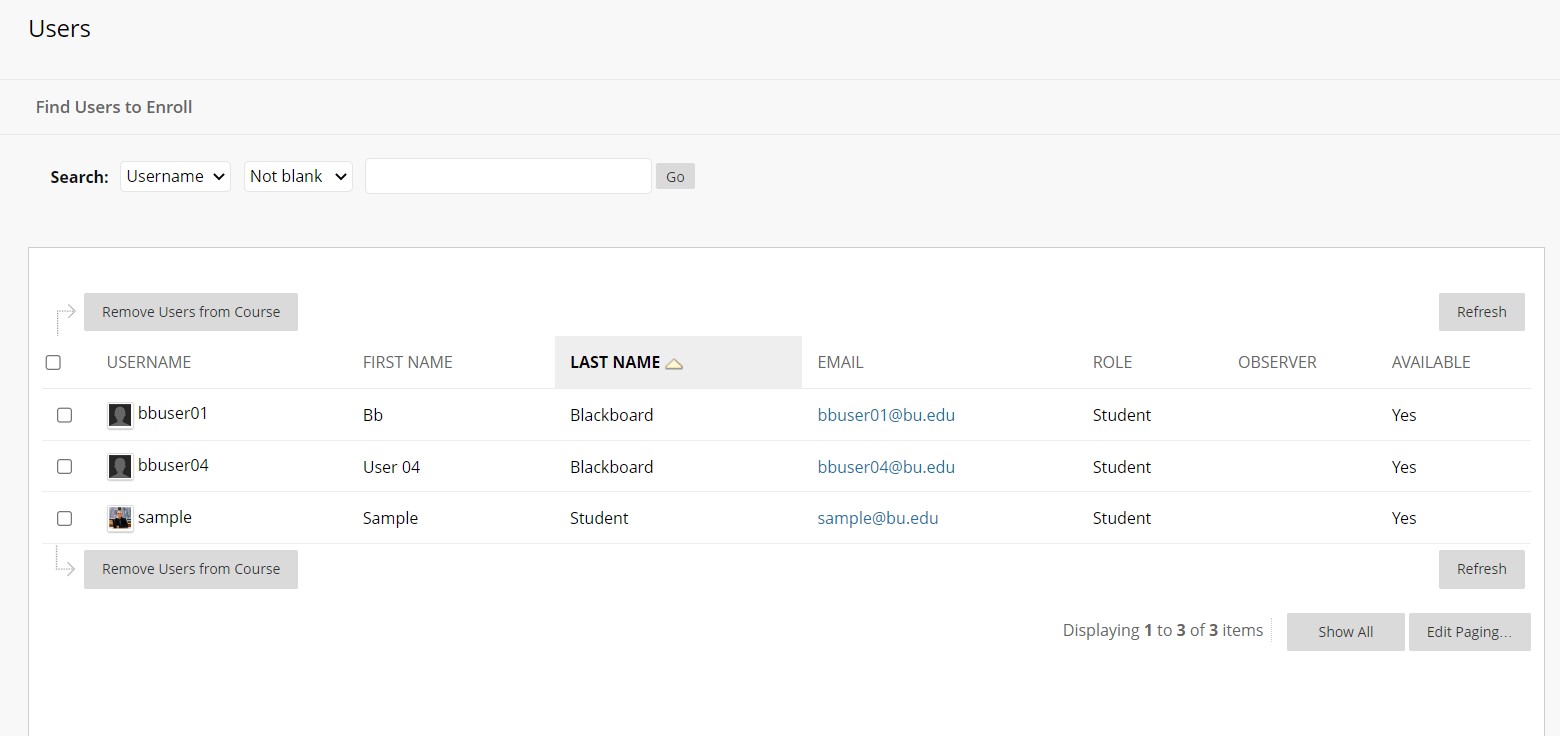
- Go back to the Users page.
- Search for the new user by username, email address, or first/ last name.

See Student Pronouns and Name Pronunciations (Original)
All Blackboard users, including faculty and students, can specify their pronouns and the pronunciation of their name on their Blackboard profile. For instructions and more information about how to add details to your profile, check out this page.
Where to See Student Pronouns and Name Pronunciation
If a student has specified their pronouns and/or name pronunciation on Blackboard, they will be visible in your course’s Users page.
- Log in to learn.bu.edu using your BU login name and Kerberos password.
- Locate and select your course in the list.
- In the navigation menu to the left, look under the Control Panel and expand the Users and Groups menu.
- Select Users. On this page, you can see a list of all students in your course.
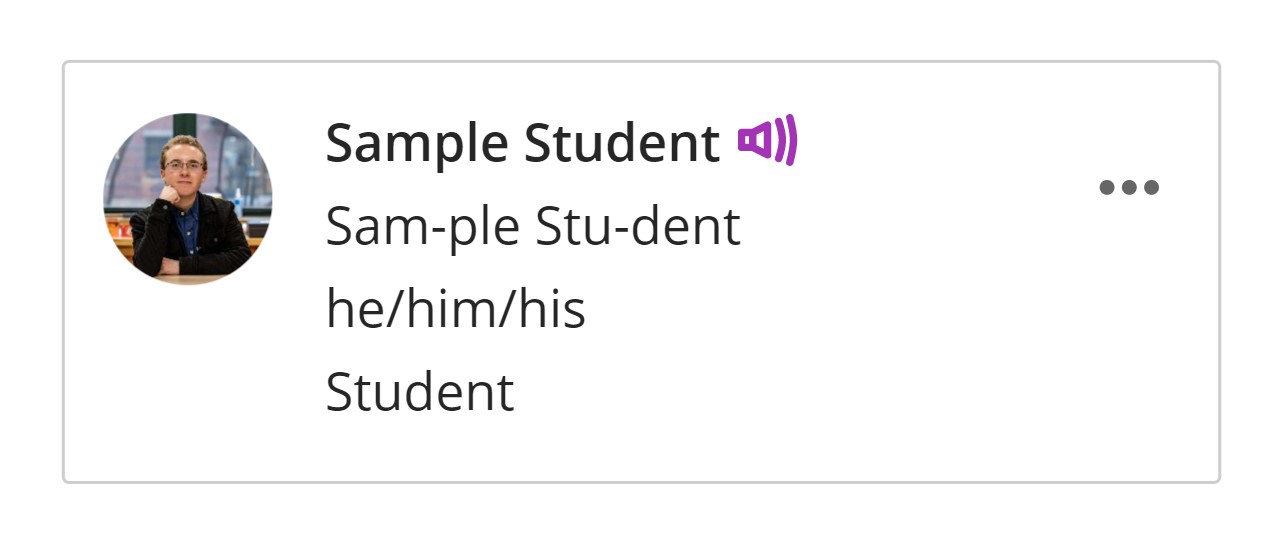
- By clicking over the avatar icon/picture of a student/user, their profile card will pop up. On this card will display the student’s name, and underneath their name will be their pronouns and phonetic pronunciation of their name if they have specified either or both. If a student has also created a recording of how their name should be pronounced, this will be indicated by a purple sound icon under the student’s name, and clicking on it will play the student’s recording of how they would like their name pronounced.

- A student’s profile card can also be accessed elsewhere in your course, wherever their avatar icon/picture can be seen, such as in various course tools. Anywhere the icon/picture is displayed, clicking on it will bring up their profile card.
Remove Users from your Course (Original)
When students drop your course, their Blackboard accounts will be made Unavailable in your course. Unavailable users cannot access your course or view it in their My Courses list. These users can be removed at your discretion. Deleting a user removes all data associated with their account, including Grades, Assignments, Discussion Posts, as well as any other work they may have completed in your Blackboard course. This action cannot be undone, so take care when removing a user from your Blackboard site. To remove a user from a Blackboard Original course:
- Log in to learn.bu.edu using your BU login name and Kerberos password.
- Locate and select your course in the list.
- In the navigation menu to the left, expand the Users and Groups menu under Control Panel.
- Select Users.
- Select the checkbox(es) next to the user(s) you would like to remove from your course.

- Click Remove Users from Course, located at the top or bottom of the user list.

Change a User's Role in your course (Original)
Instructors can adjust the role of a user enrolled in a Blackboard Learn course. To change a user’s role:
-
- Log in to learn.bu.edu using your BU login name and Kerberos password.
- Locate and select your course in the list.
- In the navigation menu to the left, expand the Users and Groups menu under Control Panel.
- Select Users.
- Locate the user whose role you wish to modify and select the drop down menu next to their name.

- Select Change User’s Role in Course from this menu.
- On the resulting page, select the role you would like to grant the user.

- Click the Submit button in the lower right-hand corner to save your changes.
Change a User's Availability in your Course (Original)
When students drop your course, their Blackboard accounts will be made Unavailable within your course. Unavailable users cannot access your course or view it in their My Courses list. Instructors can adjust the availability of users enrolled in their Blackboard Learn courses. To change a user’s availability:
-
- Log in to learn.bu.edu using your BU login name and Kerberos password.
- Locate and select your course in the list.
- In the navigation menu to the left, expand the Users and Groups menu under Control Panel.
- Select Users.
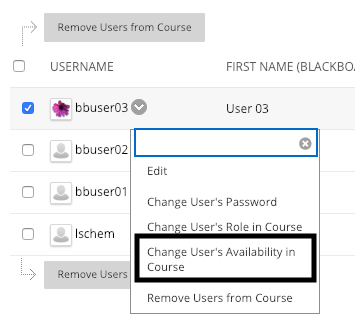
- Locate the user whose role you wish to modify and select the drop down menu next to their name.
- Select Change User’s Availability in Course from this menu.
- On the resulting page, you can select Yes or No under Available (this course only).

- Click the Submit button in the lower right-hand corner to save your changes.
Ultra
Enroll Users in Your Course (Ultra)
When students register for your course, BU automatically adds them to your Blackboard Learn course site. However, you can also manually add additional users to your course:
- Log in to learn.bu.edu using your BU login name and Kerberos password.
- Locate and select your course in the list.
- On the left navigation panel, select View everyone in your course under “Roster”. This will bring you to the Roster page, where you can access all users in your course.
- Select the Enroll People icon (the plus sign) at the top of the roster to open the Enroll People panel.

- In the search box, type a name, username, or at least two letters to reveal a list of matches. People already enrolled in your course don’t appear in the search results.
- Select one or more people. They immediately appear in the roster list. To reverse a selection, select a person’s name again.
- Choose a role for each selected person.
- Select Save. The panel closes. At the bottom of the roster, a message appears with the names of the people you added.
See Student Pronouns and Name Pronunciations (Ultra)
All Blackboard users, including faculty and students, can specify their pronouns and the pronunciation of their name on their Blackboard profile. For instructions and more information about how to add details to your profile, check out this page.
Where to See Student Pronouns
If a student has specified their pronouns on Blackboard, they will be visible in your course Roster.
- Log in to Blackboard (learn.bu.edu) with your Kerberos username and password.
- Find your Blackboard Ultra course in the Courses page and open it to see the Course Info page.
- Click on Roster on the left side of the page.
- Course staff and students should appear in a tiled array on the page. If a student has specified their pronouns on Blackboard, they will appear directly under their name and under the pronunciation of their name if that has also been specified.
- Clicking anywhere on the student’s tile will open up a side bar on the right side of the page allowing you to get a more detailed view of their profile.

Other places student pronouns appear:
| Section | Location |
|---|---|
| Group Assessments | A user can see group members’ pronouns in the overview panel A user can see group members’ pronouns while taking the assessment |
| Peer Review | A user entitled to see peer reviewers’ names can see their pronouns above their feedback when viewing a student’s attempt |
| User Management | A user can see users’ pronouns when searching for users to enroll in the course a user can see A user’s pronouns when editing them in the course roster A user can see a user’s pronouns when editing their accommodations |
| Discussions | Users can see other users’ pronouns with their responses |
| Messages | Users can see other users’ pronouns when searching for message recipients Users can see other users’ pronouns in the message panel |
| Gradebook | Instructors and graders can see users’ pronouns in the grid view Students can see their own pronouns when viewing their own grades |
| Groups | A user can see the pronouns of users in a group Instructors can see the pronouns of students in the group management view |
| User Profile | A user can see their own pronouns in their profile page A user can see their own pronouns when editing their profile in the profile settings panel |
Where to See Student Name Pronunciation
If a student has specified the pronunciation of their name on Blackboard, they will be visible in your course Roster.
- Log in to Blackboard (learn.bu.edu) with your Kerberos username and password.
- Find your Blackboard Ultra course in the Courses page and open it to see the Course Info page.
- Click on Roster on the left side of the page.
- Course staff and students should appear in a tiled array on the page. If a student has designated a phonetic spelling of how their name should be pronounced on Blackboard, it will appear directly under their name and above their pronouns if those have also been specified. If a student has also created a recording of how their name should be pronounced, this will be indicated by a purple sound icon to the right of the student’s name, and clicking on it will play the student’s recording of how they would like their name pronounced.
-
- Clicking anywhere on the student’s tile will open up a side bar on the right side of the page allowing you to get a more detailed view of their profile.
Other places student pronunciation appear:
| Section | Location |
|---|---|
| Group Assessments | A user can see group members’ name pronunciation in the overview panel A user can see group members’ name pronunciation while taking the assessment |
| Peer Review | A user entitled to see peer reviewers’ names can see their name pronunciation above their feedback when viewing a student’s attempt |
| User Management | A user can see users’ name pronunciation when searching for users to enroll in the course a user can see A user’s name pronunciation when editing them in the course roster A user can see a user’s name pronunciation when editing their accommodations |
| Discussions | Users can see other users’ name pronunciation with their responses |
| Messages | Users can see other users’ name pronunciation when searching for message recipients Users can see other users’ name pronunciation in the message panel |
| Gradebook | Instructors and graders can see users’ name pronunciation in the grid view Students can see their own name pronunciation when viewing their own grades |
| Groups | A user can see the name pronunciation of users in a group Instructors can see the name pronunciation of students in the group management view |
| User Profile | A user can see their own name pronunciation in their profile page A user can see their own name pronunciation when editing their profile in the profile settings panel |
Manage Users in Your Course (Ultra)
You can change certain settings and manage the roles of users in your course, including students and your teaching team (TAs, LAs, GSTs, Graders, etc).
- Log in to learn.bu.edu using your BU login name and Kerberos password.
- Locate and select your course in the list.
- On the left navigation panel, select View everyone in your course under “Roster”. This will bring you to the Roster page, where you can access all users in your course.
- Click the three dots next to someone’s name to access that person’s menu.
- Select Edit member information to open the Member Information panel. You can change anyone’s role, deny access to your course, or remove a person from your course.
- By selecting the menu for your user and opening your own panel, you can also update your personal information. Your changes are reflected in your profile and throughout the system. Students can edit their information in the same way.

- When you change a person’s role, the person is repositioned in the roster list if you’re in grid view. Roles appear in this order: instructors, teaching assistants, graders, course builders, and students. In list view, all members appear in alphabetical order.
- Instructor: Creates course content and facilitates course interactions. Instructors can access private courses and open a course when it’s ready for students.
- Primary Instructor: If a course has multiple instructors, any of them can designate the primary instructor from the roster. Open an instructor’s Member Information panel and select the Primary instructor option. The primary instructor is listed first in the roster. If multiple primary instructors exist, they’re listed alphabetically before other instructors in the roster.
- Teaching Assistant: Creates course content, facilitates course interactions, and has access to private courses, same as instructors. Role limitations are set by your institution. Teaching assistants can’t delete an instructor from a course.
- Grader: Assists instructors in the creation, management, and grading of coursework. Graders can’t access a private course.
- Facilitator: Assists instructors to keep the curriculum moving forward. The facilitator has default privileges related to course materials, gradebook, calendar, announcements, discussions, and groups to assist instructors in the progress of a course.
- Course Builder: Creates content, manages a course, and can access private courses. Course builders can’t access student grades or remove an instructor from a course.
- Student: Submits coursework and participates in discussions. Students can’t create or grade course items. Students see private courses in their course lists, but they can’t access them.
Remove Users from Your Course (Ultra)
When students drop your course, their Blackboard accounts will be made Unavailable in your course. Unavailable users cannot access your course or view it in their My Courses list. These users can be removed at your discretion. Deleting a user removes all data associated with their account, including Grades, Assignments, Discussion Posts, as well as any other work they may have completed in your Blackboard course. This action cannot be undone, so take care when removing a user from your Blackboard site. To deny a user’s access or remove a user from a Blackboard course:
- Log in to learn.bu.edu using your BU login name and Kerberos password.
- Locate and select your course in the list.
- On the left navigation panel, select View everyone in your course under “Roster”. This will bring you to the Roster page, where you can access all users in your course.
- Click the three dots next to someone’s name to access that person’s menu.
- Select Edit member information to open the Member Information panel.
- Clear the check mark for Allow access to course to deny course access yet retain the person’s course record and activity. The roster indicates the person’s status with a gray profile picture with a diagonal line. The person no longer sees your course on the Courses page.
- Select the Remove Member icon to remove a person from your course. This action also deletes all data and grades associated with the person. You’ll receive a pop-up confirmation window. To keep the data, you can cancel and deny the person’s access to your course instead.
Put Students into Groups (Ultra)
As an instructor, you can create group sets to use for graded assignments, tests, and discussions. This can be helpful for separating students by lecture or discussion sections, or even smaller homework and project groups. You can also create groups for activities other than graded work, such as volunteering or field trips.
- You start the course groups creation process on the Course Content page. In the Details & Actions section under Course Groups, select Create and manage groups. If you’ve already set up course groups, select View sets & groups link.

- If you already have course groups, select New Group Set on the Course Groups page.

- You can create as many course groups as you want, with any number of students in each group. You can also create new course groups or remove course groups.
- From the Group students menu, you can divide your students among groups in these ways:
- Custom
- Randomly assign
- Self-enrollment
- Reuse groups
- You can also select the plus sign below the graphic to create as many groups as you need and add students.

Custom Groups
You can create a single, custom group or as many groups as you want, with any number of students in each group.
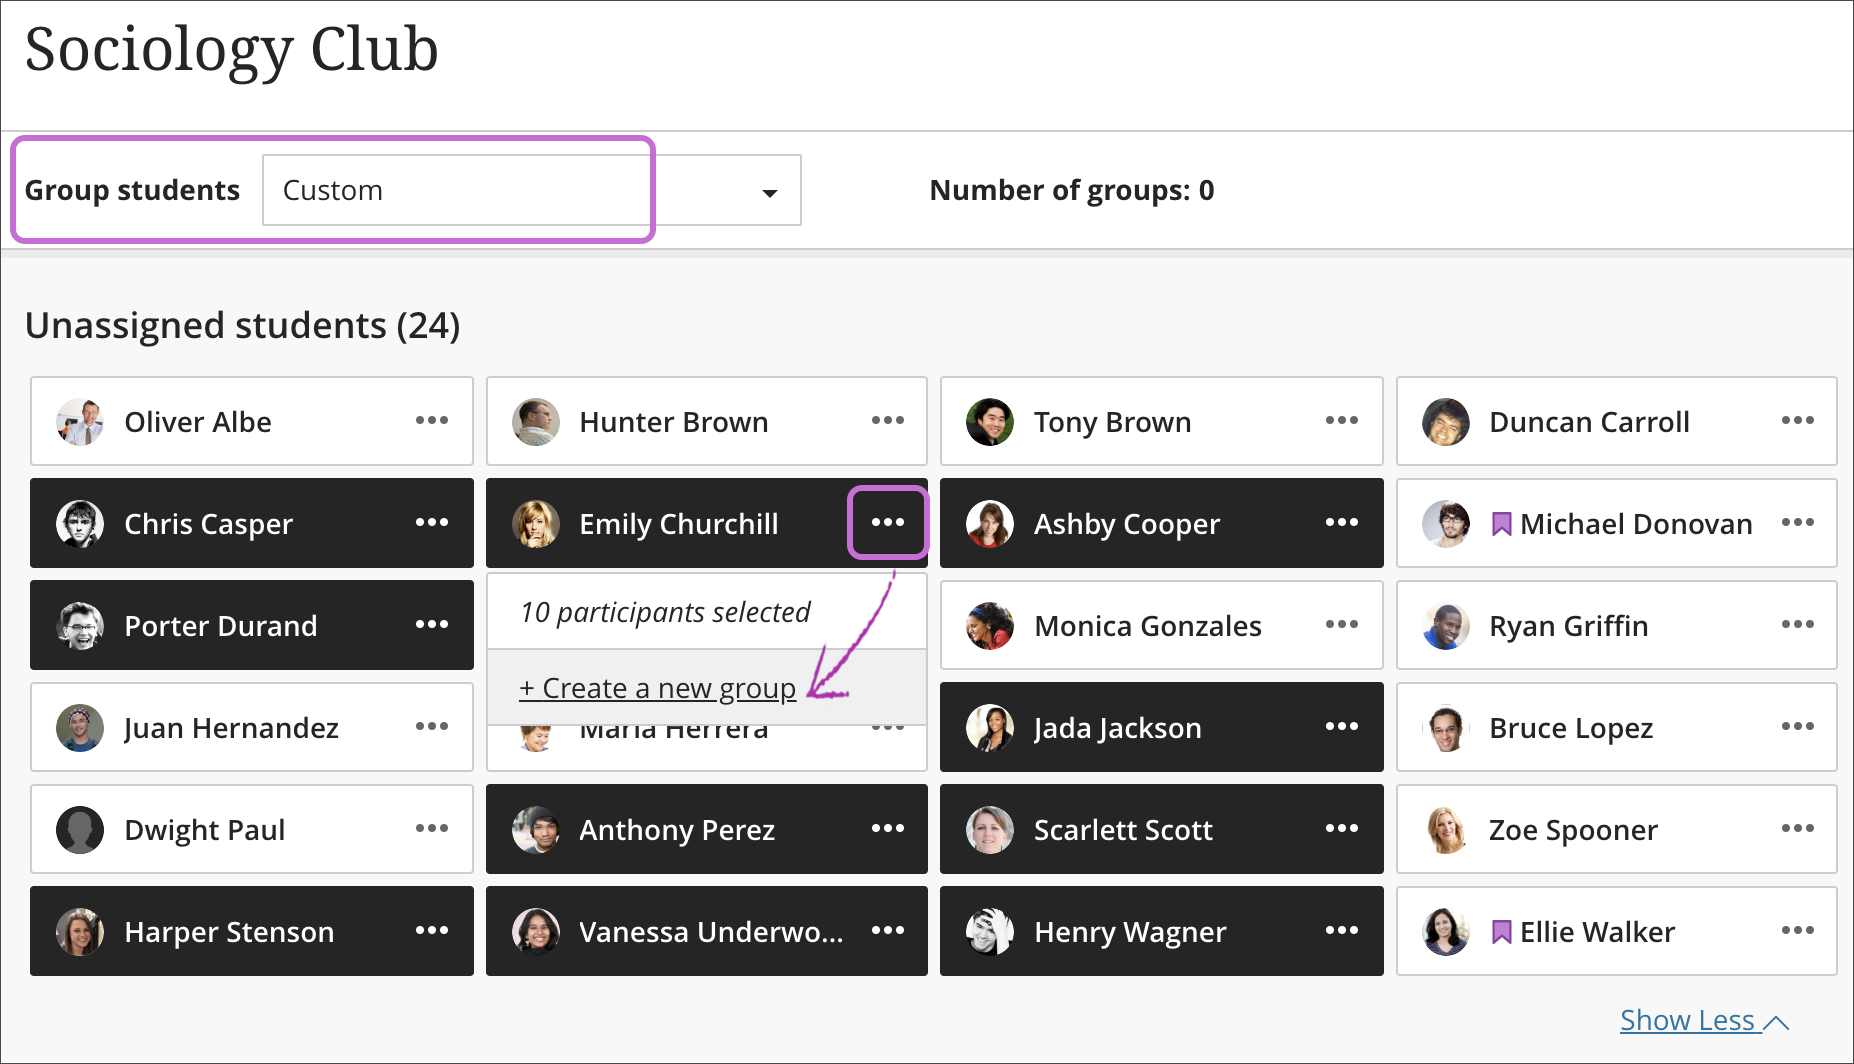
- In the Group students menu, select Custom and provide a name at the top of the page.
- Select each student’s name one after the other to select them as a group. Select a student’s name again to remove the selection.
- After you select the students, open the menu next to one of their names and select Create a new group. You can also move multiple students to a group listed in the menu.
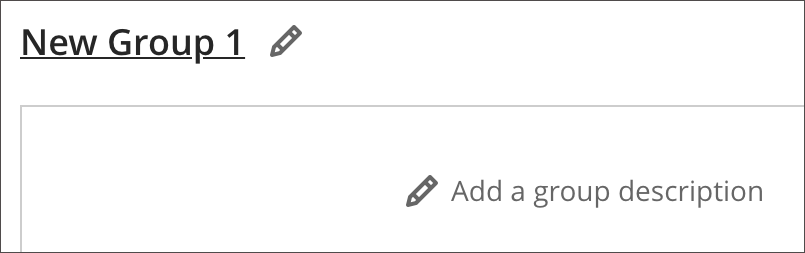
- Edit the group name if you want to change the default naming.
- Optionally, provide a group description that also appears to members of that group. You have no limit on the number of characters.
- Select the plus sign wherever you want to add another group. You can also repeat steps 2-5.
Random Groups
Students are randomly assigned to the number of groups you choose. You need at least four students so the system can randomly assign students to at least two groups.
Random assignment may work best if you teach courses that contain many students without the opportunity to know them individually. You can assign students to groups quickly and without preparation.

- In the Group students menu, select Randomly assign and provide a name at the top of the page.
- In the Number of groups menu, select how many groups to create. You need to create at least two. Students are equally assigned to the number of groups you choose.
- To remove all students from the current group set, select Unassign All at the top of the page. The menu option changes to Custom if you move students to different groups after they’re grouped and before you save.
- Edit each group name if you want to change the default naming.
- Optionally, provide group descriptions that are shown to group members. You have no limit on the number of characters.
Select the plus sign wherever you want to create a group in addition to the groups the system created. When you add or delete groups, the menu option changes to Custom and any affected students aren’t redistributed.
Self-Enroll Groups
You can ask students to self-enroll in course groups. Only students may join. Students receive a course announcement and an activity stream notification about groups they need to join.
Students see Join a group and New in the Details & Actions panel on the Course Content page. You can also add an enrollment period. Students are notified when the enrollment deadline approaches. When the enrollment period ends, students can no longer join groups, and they’re enrolled automatically.
If you added a preview user, that user is also enrolled automatically in a group. You can remove the preview user before or after you create self-enrollment groups.

- In the Group students menu, select Self-enrollment.
- Your students are evenly divided among the groups listed next to Number of groups. You need to create at least two self-enrollment course groups.
- Select the plus sign wherever you want to add another group. The Number of groups updates automatically. You can add and delete groups even after students have started to join. If you delete a group that students have already joined, they’re moved to the unassigned list. You’ll need to notify them to join one of the remaining groups or add them to a group. Reminder: If you add an enrollment period, unassigned students are enrolled automatically when the period ends.
- Optionally, add an enrollment start and end date. Select the arrow next to Advanced options to collapse the enrollment section.
- Optionally, change or clear the Maximum number of members per group that appears by default. The optional maximum must be 2 or greater. If you added or deleted groups, the maximum number doesn’t update.
Pay attention to the maximum members per group and the number of groups. For example, if you lower the maximum number, some students won’t be allowed to enroll in a group at the end of the enrollment period. You’ll need to create new groups and enroll the students.
To allow unlimited members per group, leave blank. Students see the maximum number allowed when they make their group selections. If you allow an unlimited number per group, students see the total number of students in their class.
You can override the maximum membership for a group. For example, you can add a newly enrolled student to a group.
- Select the Hide enrolled members check box if you don’t want students to see who’s already joined.
- Edit each group name if you want to change the default naming.
- Add optional group descriptions. You can add information to help students choose a group. You have no limit on the number of characters.
- Open the menu next to a group to access the management options.
After you create a group or a group set, you can add or delete individual groups, and manage student membership. You can also edit group names, add or edit group descriptions, and send messages to your groups to kick off collaboration!
As an instructor, you and other roles with elevated rights, are able to grant differentiated access to content to your students based on their ultimate goals. As the newest option to the conditional availability rules, already present in Ultra courses (date/time and performance-based rules), you and your fellow faculty members can now allow certain students to have access to specific content while selecting one or both existing rules mentioned above.

Add and Delete Groups
Select the plus sign wherever you want to add a group.
If you no longer need a group, open the group’s menu and select Delete group. The students in that group are unassigned automatically and appear at the top of the page. You can manually assign these students to new groups. Or, you can randomly assign all students—not only the students you unassigned—to the number of groups you choose.
Ramifications
- If you add or delete a group in a group set used to create a new group set, the new group set is unaffected.
- If you add or delete a group in a group set that you used to create a group assessment or discussion, that content item’s groups are updated. Edits to group titles and descriptions also affect the content items.
- If you add or delete a group in a group assessment or discussion that’s based on a course group set, the course group set is updated. Edits to group titles and descriptions also affect the course group set.
- If you delete a group set used to create a new group set, the new group set is unaffected.
- If you delete an entire group set used to create a group assessment or discussion, the content item’s groups are removed.
- If you delete a group assessment or discussion based on a course group set, the group set is unaffected.
Manage Student Membership
Open the menu next to a student’s name to access these options:
- Start a new group with the student as a member.
- Select Unassign to remove the student from the group. Unassigned students appear at the top of the page.
- Assign the student to a different group that already exists. Select the group’s name in the menu. Groups with no members don’t appear.
You can also move multiple students to a different group in one action, create a new group for them, or unassign them all from the group.
To remove all students from all groups, select Unassign All at the top of the page.
Ramifications
- Membership changes in a group set affect the content-level items where the groups are used, such as in group discussions and assessments.
- Membership changes in a content-level item based on a course group set affect the course group set.
- Membership changes in a group set do NOT affect other group sets that are based on the group set.
All groups you’ve created appear on the Course Groups page. Group sets with no members also appear. At the top of the page, the numbers of groups sets and individual groups are listed.
You can also create a new group set.
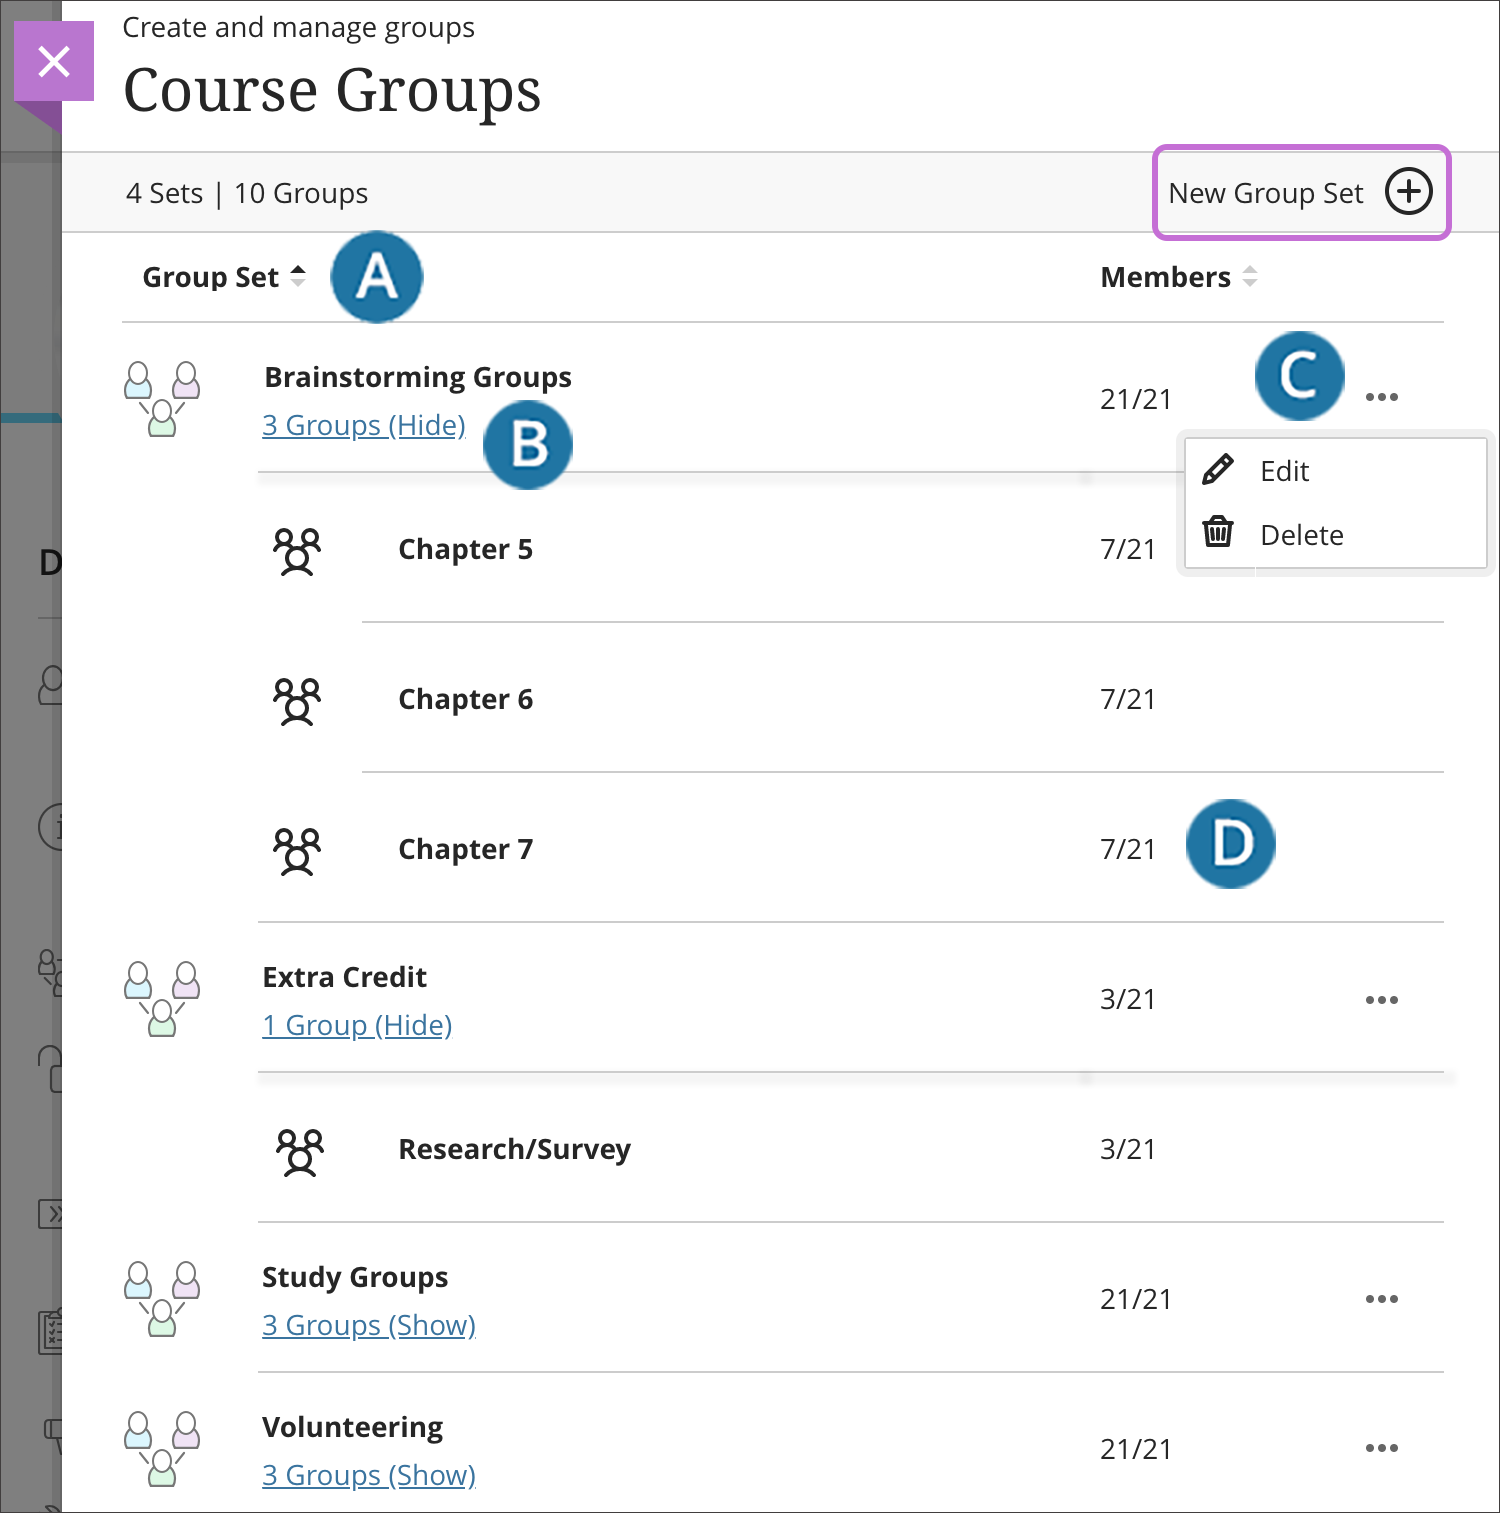
- Select a heading to sort your groups or the number of members in ascending or descending order.
- Show or hide the groups in a group set.
- Open a group set’s menu to edit or delete the group.
- View the number of members in each group out of the total number of students in the course.
Release Conditions on Assignments for Groups

This feature constitutes an incredible way for you to create remedial paths for certain students, give different content to undergraduate and postgraduate students in a course, among other possible applications.